Can You Dig It is a monthly series by Kristin Guy in which a real-life garden DIY is tackled with style. Whether you've got an expansive outdoor plot or just a few houseplants, Kristin will inspire you to grow even more with easy-to-accomplish projects and horticultural know-how.
When you think about preserving summer produce, pickling and canning are typically what comes to mind. Drying tends to be an afterthought, but it can be just as powerful for saving summertime flavors! There's something calming about the drying process, too — you quite literally have to slow down and be patient — and you can easily create your own drying tools to make this ritual even more special.
Throughout the summer, I'm consistently harvesting and drying herbs to stock up my kitchen for year-round use. It's easy to do, especially since herbs are easy to grow, and it saves you a ton of money in the spice aisle. You don't need a fancy dehydrator, either. With just a few supplies, you can make your own DIY herb dryers that can easily be customized to suit your space and style.
As you decide which of these two projects to make, keep in mind the types of plants you want to dry and be sure to leave enough space for them in your design. While herbs are easy for beginners to dry, these designs can be used for flower stems, peppers, tea leaves, and more.
How to make a hanging herb dryer
This hanging herb dryer is extremely easy to make, and it can be expanded with multiple tiers to accommodate more herbs. For a multi-level dryer, you'll want to buy several hoops in staggered sizes.
Materials:
- Metal or wooden floral hoops — at least 8-12 inches in diameter, staggered in size for a multi-level design
- A hanging basket chain — alternatively, leather cord or twine
- Metal hooks
- Garden twine
How to make it:
/d5ffa6d9-deab-460a-bda6-233bc68297fa--Hanging_dryer.jpg)
Photo by Kristin Guy
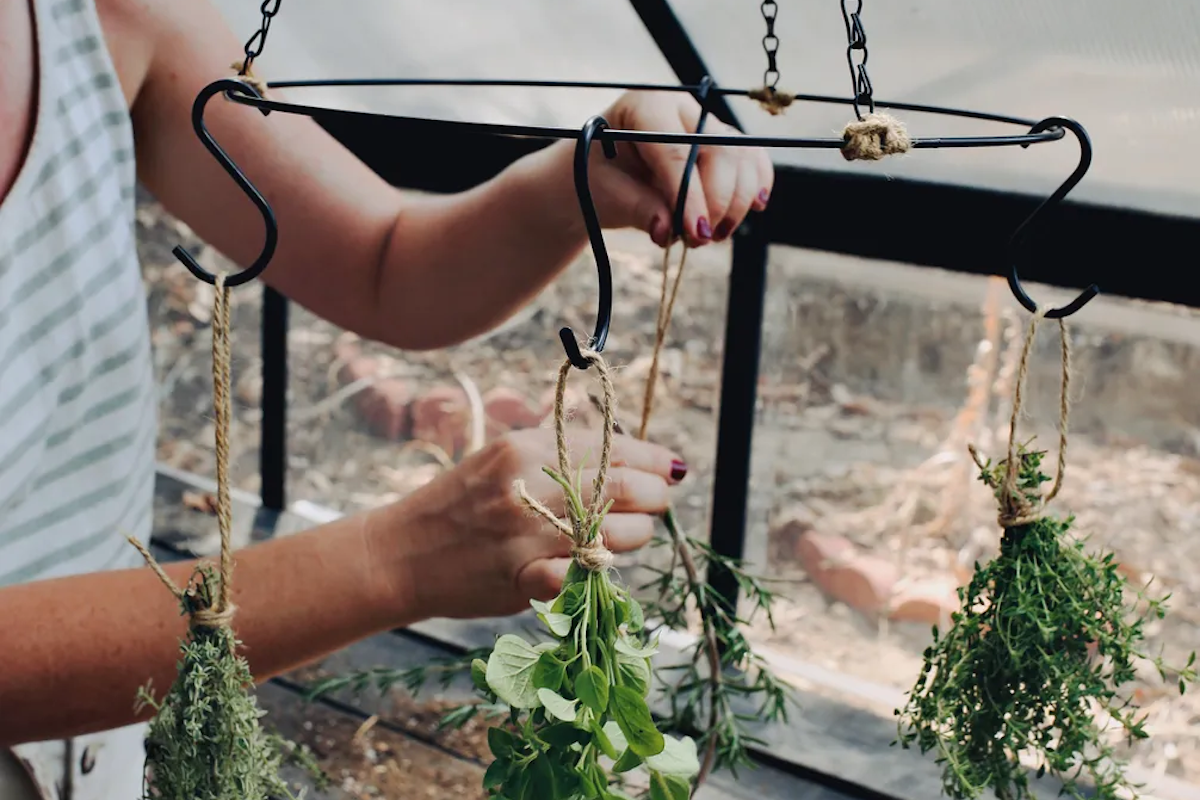
Attach the basket chain or cord to your hoop — three attachment points will give you the best balance. Tie together the cords at the top, if needed, and hang as many hooks as you'd like from the hoop. If you're making a multi-tier hanger, start with the smallest ring at the top and hang larger hoops beneath it to create a cone-like shape. You can make the dryer as big or little as you want, so feel free to customize to your heart's desire.
/78b4114c-b138-4b91-9e16-4df8e984f70b--Hooks.jpg)
Photo by Kristin Guy
Once your dryer is complete, wrap bundles of fresh herbs together with twine. Use the string to make a loop that can hang over each hook. For best results, hang the herbs upside down in a cool, dark place, as extreme heat and/or light can take away from the flavor.
Once completely dry — and I do mean completely dry, or else they may get moldy — store your herbs in an airtight container. You can keep them on the stem or save just the leaves for easy use when cooking.
How to make a stackable drying screen
These drying screens can be made using old picture frames — upcycling at its finest — and you can stack several on top of each other to dry all your herbs in one place.
Materials:
- Fine mesh screens or silicone dehydrator sheets
- A wooden frame — ideally 8x10 or larger
- Staple gun
- Half wooden beads — these will raise the frame off the surface a few inches
- Scissors or wire cutters
- Hot glue gun
/7857ed60-c900-4eb3-881d-22b1508e15e9--08_Herb_Drying_DIY_Food52_Kristin_Guy.jpg)
Photo by Kristin Guy
How to make it:
Measure the interior of the frame — the screen will sit on the inner lip where the glass usually goes — then cut the screen so it will fit inside. Lay the mesh inside the frame, and secure it in place using your staple gun.
/df7f8c2e-aeee-4a31-806b-40431ad1eaf8--screen_weights.jpg)
Photo by Kristin Guy
Use hot glue to attach the half beads to the back side of the frame, with one in each of the four corners. If you're planning to stack several screens, you'll want to make sure the feet are tall enough to provide space for herbs (and air circulation) between the panels.
For best results when using this style of dryer, arrange fresh herbs without overlapping to allow for maximum airflow. Leave them in a cool, dry place for several weeks, and turn them over periodically to make sure that they are completely dried out before storing them in an airtight container.


Shares